 Mailcrate
Workspace Onboarding
Create a workspace, walk through the setup wizard, and use the setup checklist to finish what is left.
A workspace holds everything you send from: contacts, emails, campaigns, journeys, sending domains and API keys. Nothing is shared between workspaces, so most companies have one per brand or product, plus an optional sandbox for testing.
Create a workspace
The first time you log in, Mailcrate shows a welcome screen. It lists any Pending invitations you can Join, the workspaces you already belong to, and a form to Create a new workspace.
Enter a Workspace name, usually your company or brand.
Pick an icon and colour under Appearance. They help you tell workspaces apart in the workspace switcher.
Choose the Environment:
- Production sends real email. Pick this for your live sending.
- Sandbox never sends real email: sends are recorded but nothing leaves Mailcrate, and sending domains verify without DNS. Use it to try things out or to test an integration.
This choice can't be changed later. You can always create a second workspace of the other type.
Choose Create Workspace. Mailcrate opens the setup wizard.
The setup wizard
The wizard has four short steps and a review screen. Every step can be skipped with Skip for Now, and Skip setup for now at the top leaves the wizard altogether; you can come back to it, and anything you skip shows up on the setup checklist afterwards.
01
About your company
Company name and postal address for your email footers.
02
Sending
Your sending domain and the address you send from.
03
Your audience
Import contacts now, later, or through the API.
04
Features
Turn on the optional extras you need.
1. About your company
Enter your company name and mailing address. Mailcrate shows them in your email footers through the {{ sender_address }} merge tag, so recipients know who is writing to them. Anti-spam laws such as CAN-SPAM require a postal address in marketing email, so fill in at least the street, city, postal code and country.
You can change the address later in Settings → Workspace → General.
2. Sending
Add the domain you will send from, publish the DNS records Mailcrate shows, and create your first sender identity (the "From" name and address). This step is covered in detail in Verify Your Sending Domain.
DNS changes can take a while to appear. You don't need to wait: Mailcrate re-checks every 15 minutes in the background, so continue with the wizard and the domain verifies on its own.
3. Your audience
Choose how you'll bring in contacts:
- Import a CSV opens the importer, where you upload a spreadsheet and map its columns. See Import & Export.
- I’ll add contacts later skips the step.
- I’ll use the API skips the step and points you to your API keys at the end, for teams that sync contacts from their own systems.
4. Features
Campaigns, transactional email, the delivery log, contacts and segments, and emails are included in every workspace. This step lets you switch on optional extras:
| Feature | What it adds |
|---|---|
| Inbound email | Receive and read email sent to your own addresses inside Mailcrate. |
| Custom events | Send events from your integration and explore them across your audience. |
| Journeys | Automated email flows triggered by events your contacts fire. |
| Subscription groups | Let contacts opt out of specific topics instead of everything. |
| A/B testing | Test subject lines, content or senders and send the winner. |
| Local-time delivery | Send a campaign at the same local time in every recipient's timezone. |
Every feature can be turned on or off later in Settings → Workspace → Features. Only owners and admins can change them.
Review
The last screen, You’re set up, summarises what is ready and suggests next steps, such as creating an API key, creating your first email and sending your first campaign. Choose Go to Dashboard to finish.
Only workspace owners and admins see the wizard. Members who join a workspace that is still being set up go straight to the dashboard.
The setup checklist
Until your workspace is ready to send, the sidebar shows a Get set up checklist. It checks your workspace on every visit, so items tick themselves off as you complete them; there is nothing to mark by hand.
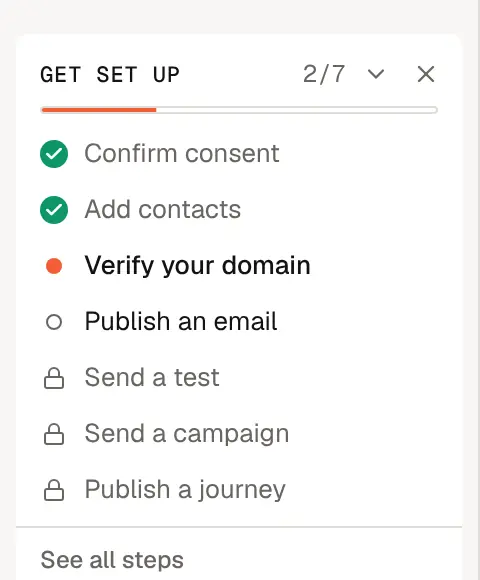
Choose See all steps to open the full Activation page, which explains each item and links to where you do it:
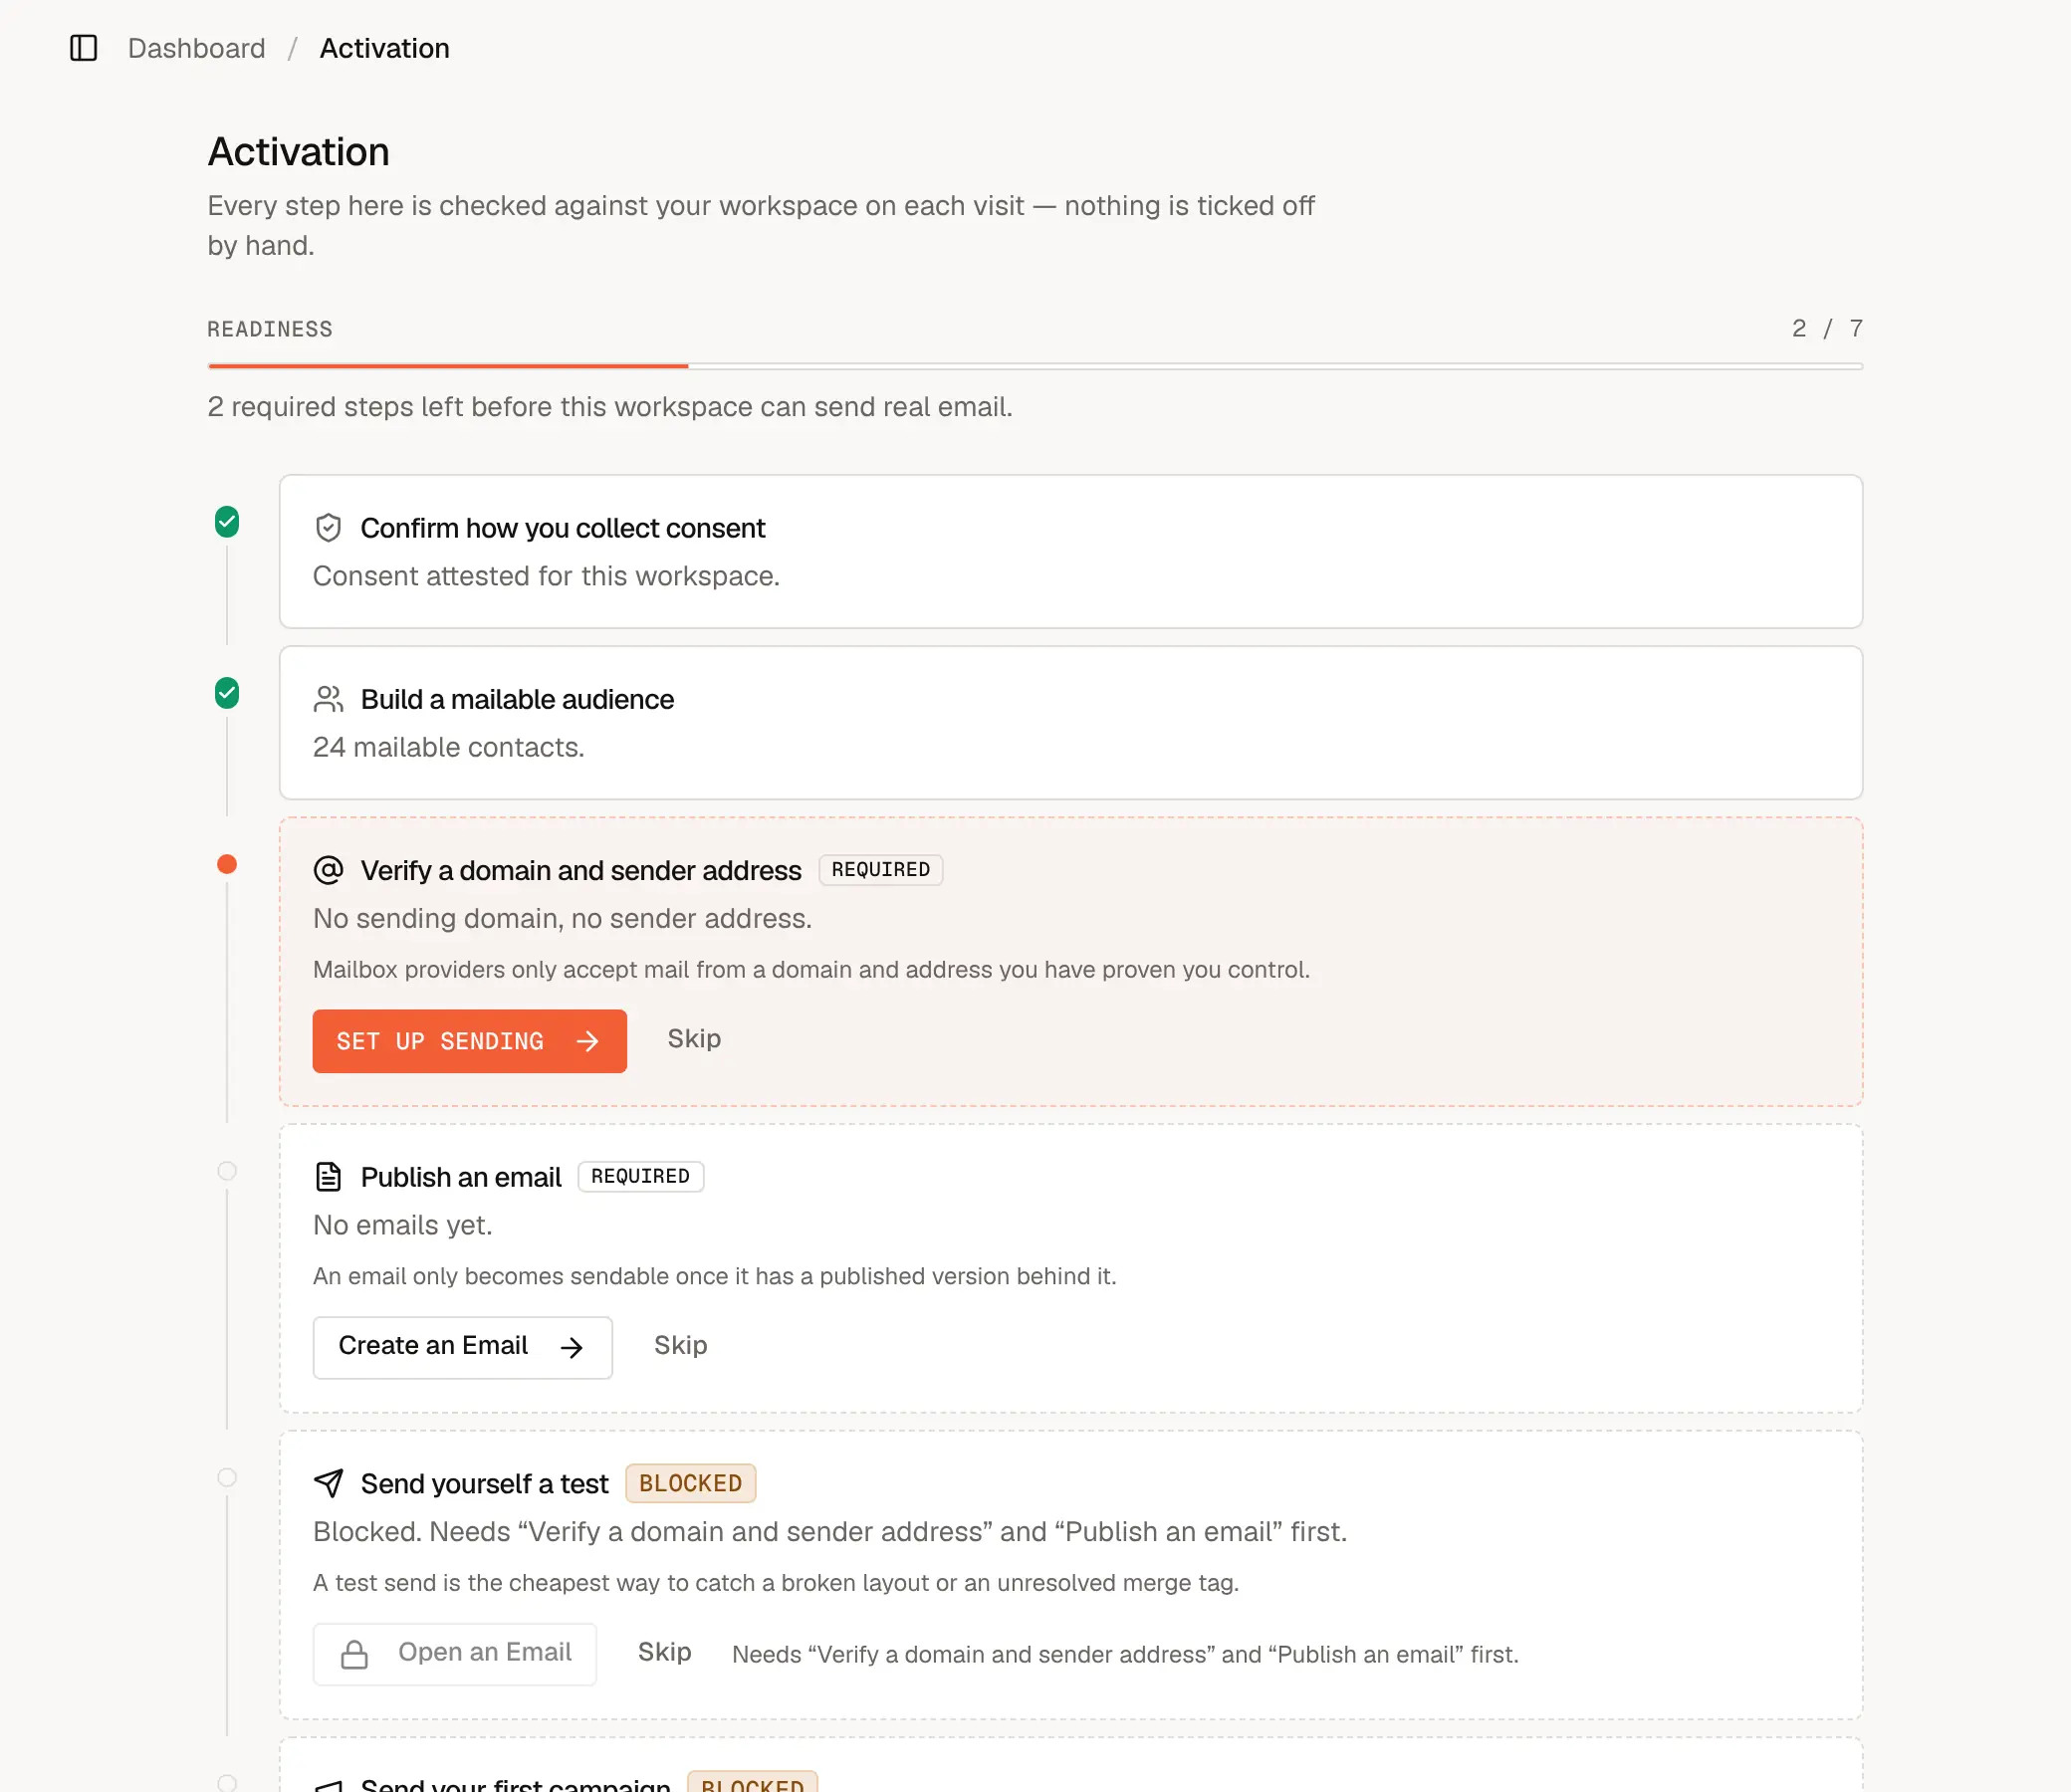
| Step | Required to send | Where you do it |
|---|---|---|
| Confirm how you collect consent | Yes | Shown the first time you add or import contacts |
| Build a mailable audience | Yes | Contacts: at least one subscribed contact who isn't suppressed |
| Verify a domain and sender address | Yes | Settings → Mail Setup → Mailing |
| Publish an email | Yes | Emails |
| Send yourself a test | No | The Send test email button on an email or campaign |
| Send your first campaign | No | Campaigns |
| Publish your first journey | No | Journeys (when the Journeys feature is on) |
The four required steps must be done before the workspace can send real email. The optional steps can be skipped: a skipped step leaves the sidebar but stays on the Activation page, so you can pick it back up. You can also hide the sidebar checklist with its close button and bring it back from the Activation page.
Next step
Continue with Verify Your Sending Domain, the one step every workspace needs before it can send.