 Mailcrate
Your First Campaign
Build, test and send your first broadcast campaign from start to finish.
A campaign is a one-off email to a group of contacts, like a newsletter or a product announcement. This page walks through sending your first one. For every option in detail, see Creating Campaigns.
Before you start
Your workspace needs three things, which the setup checklist tracks for you:
- A verified sending domain with at least one sender identity. See Verify Your Sending Domain.
- Contacts to send to: add a few by hand on the Contacts page, or import a CSV. For a first test, adding yourself is enough.
- A published email. Go to Emails, choose New Email, design it, and publish it. See Email Templates.
Build the campaign
Create a draft
Go to Campaigns, choose Create Campaign, give it a name only your team sees (for example October newsletter), and choose Create Draft.
The campaign opens in the builder. The rail at the top shows its four steps, Audience, Email, Delivery and Review, each with a short summary of what is set and a check mark once it is complete. You can move between steps freely; every change is saved as a draft.
Choose the audience
Under Recipients, pick who receives the campaign:
- All contacts sends to every subscribed contact in the workspace.
- A segment sends to the contacts in that segment. See Segments.
- Custom filter lets you build rules just for this campaign.
The Audience sample on the right previews the contacts who match. Unsubscribed and suppressed contacts are always left out, so you can't accidentally email someone who opted out.
Attach the email
On the Email step, choose Choose email and pick the email you published, or Create new to make one.
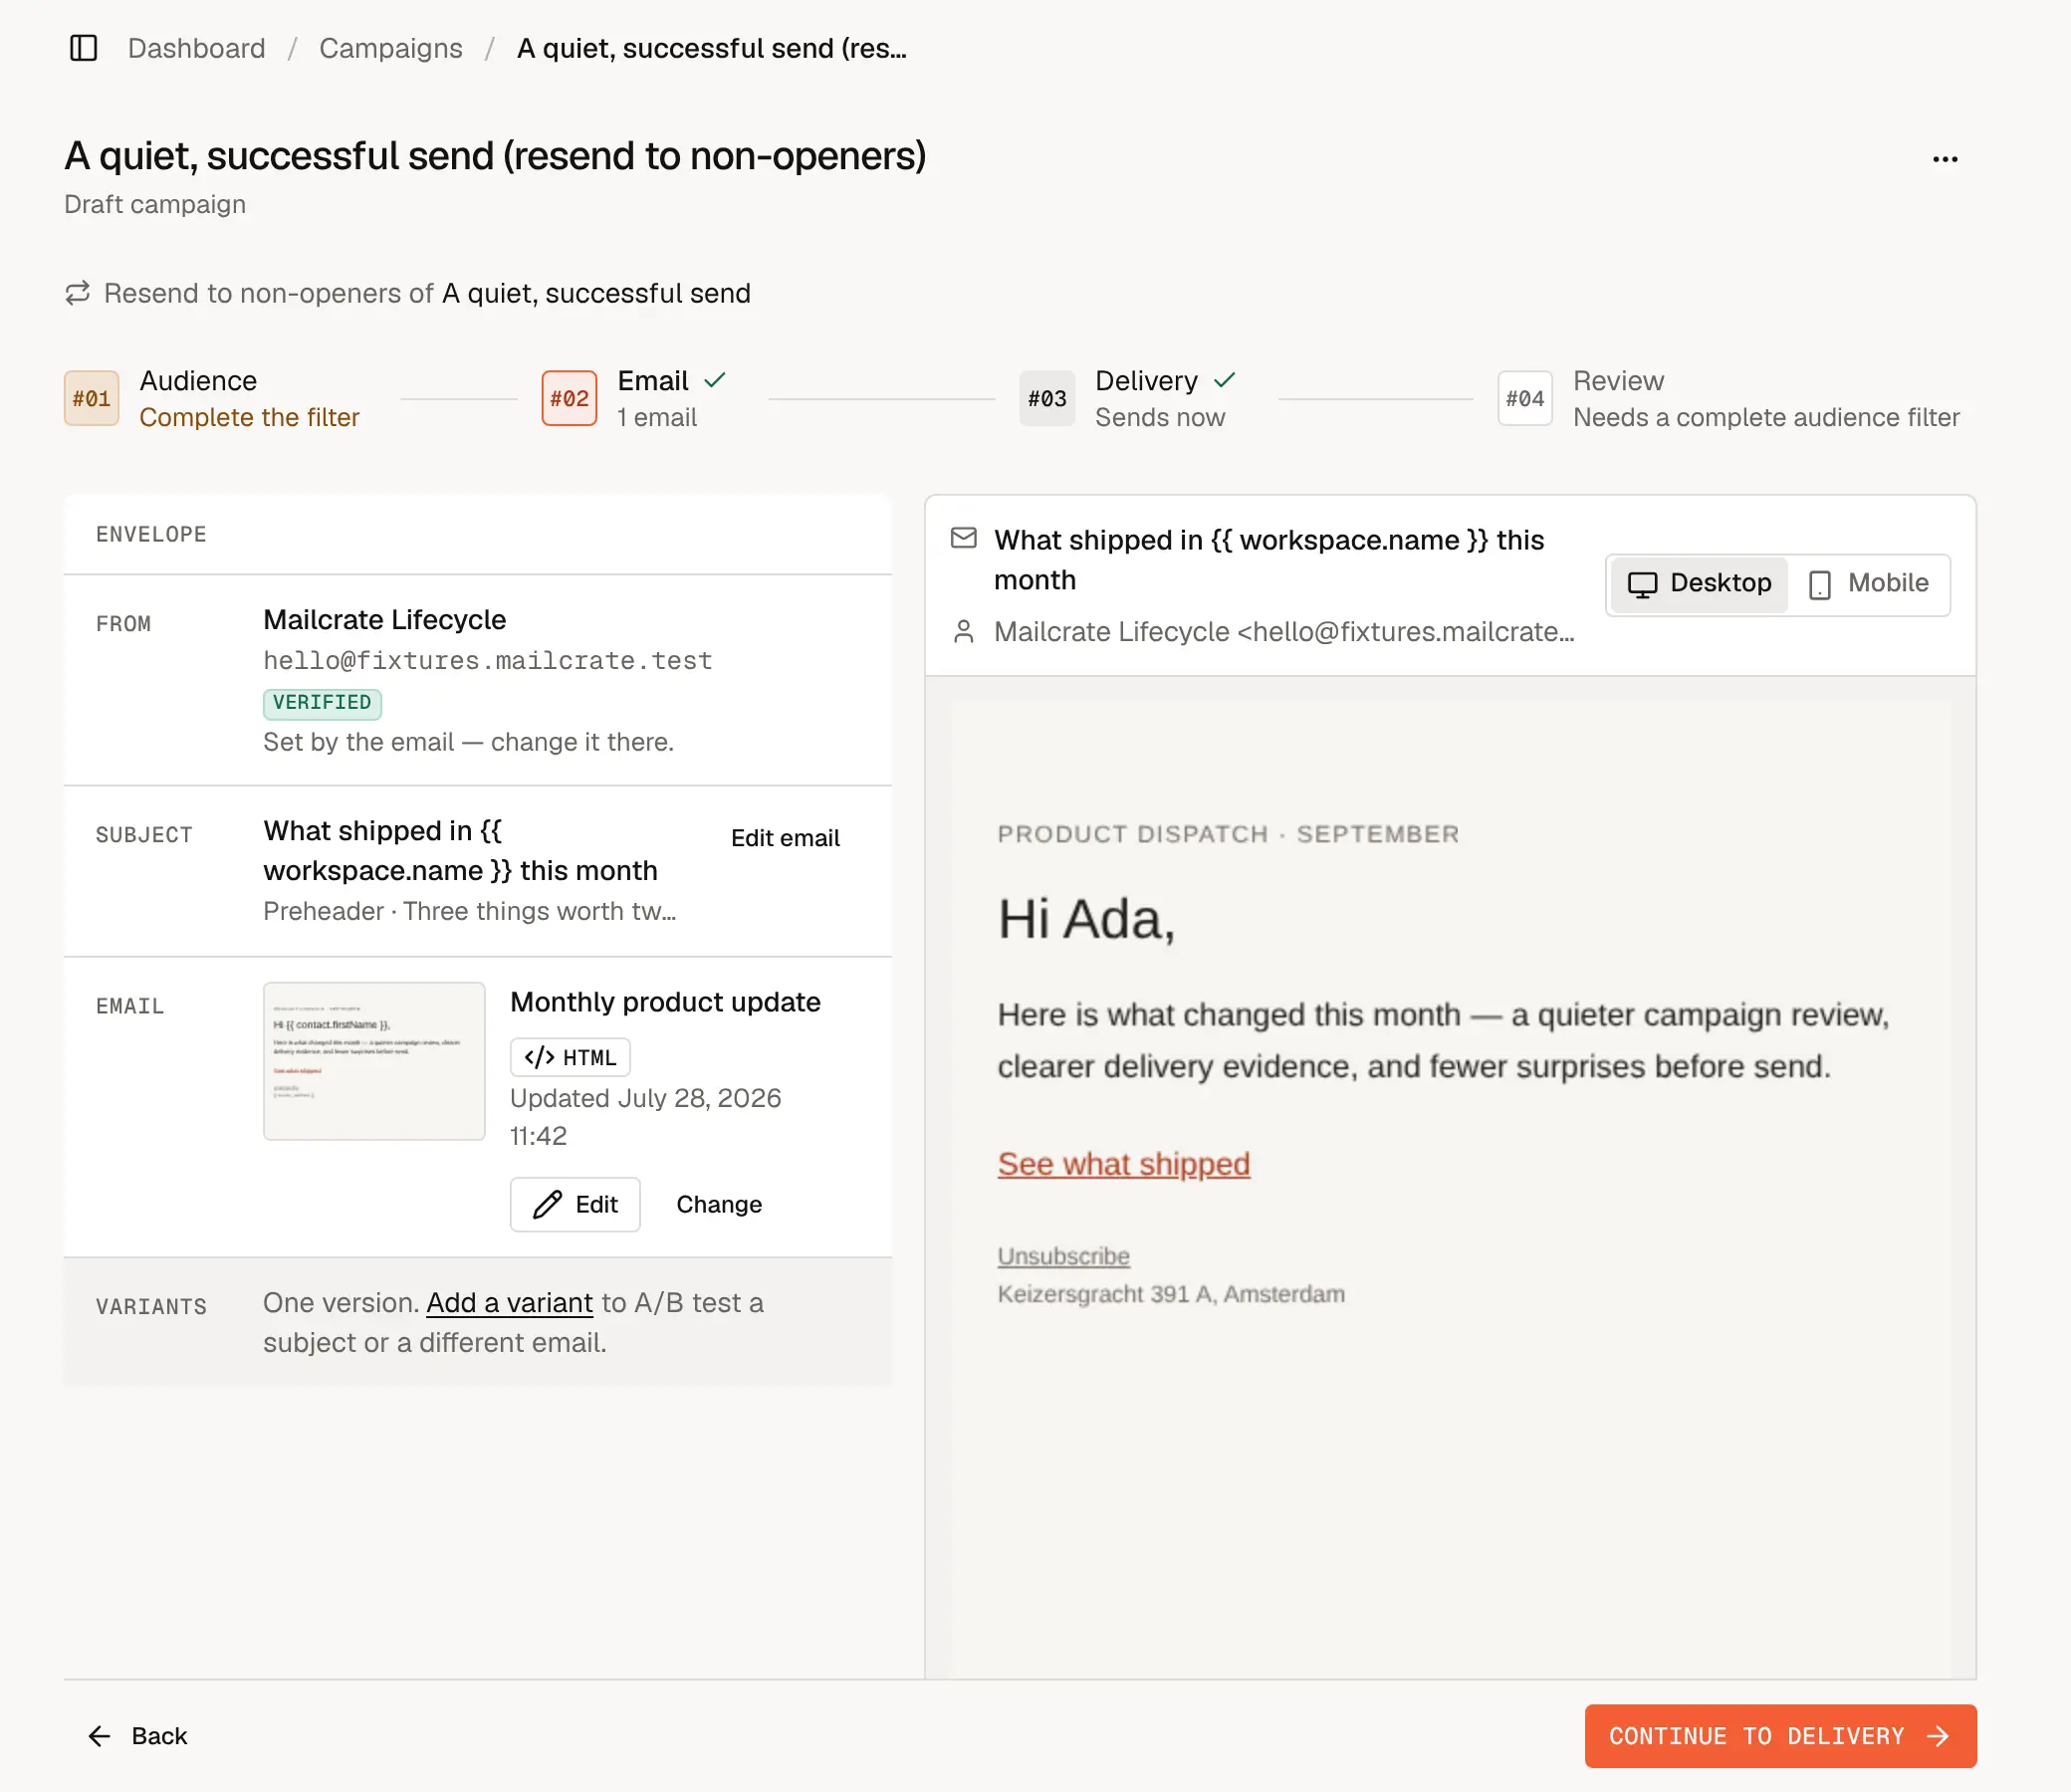
The From address and Subject come from the email. You can override the subject for this campaign only; leave it empty to use the email's own. The preview on the right renders the email exactly as a recipient sees it, with merge tags filled in with sample values.
Pick when it goes out
On the Delivery step, choose Send now to send as soon as you confirm, or Schedule to pick a date and time. Leave the other settings at their defaults for your first campaign.
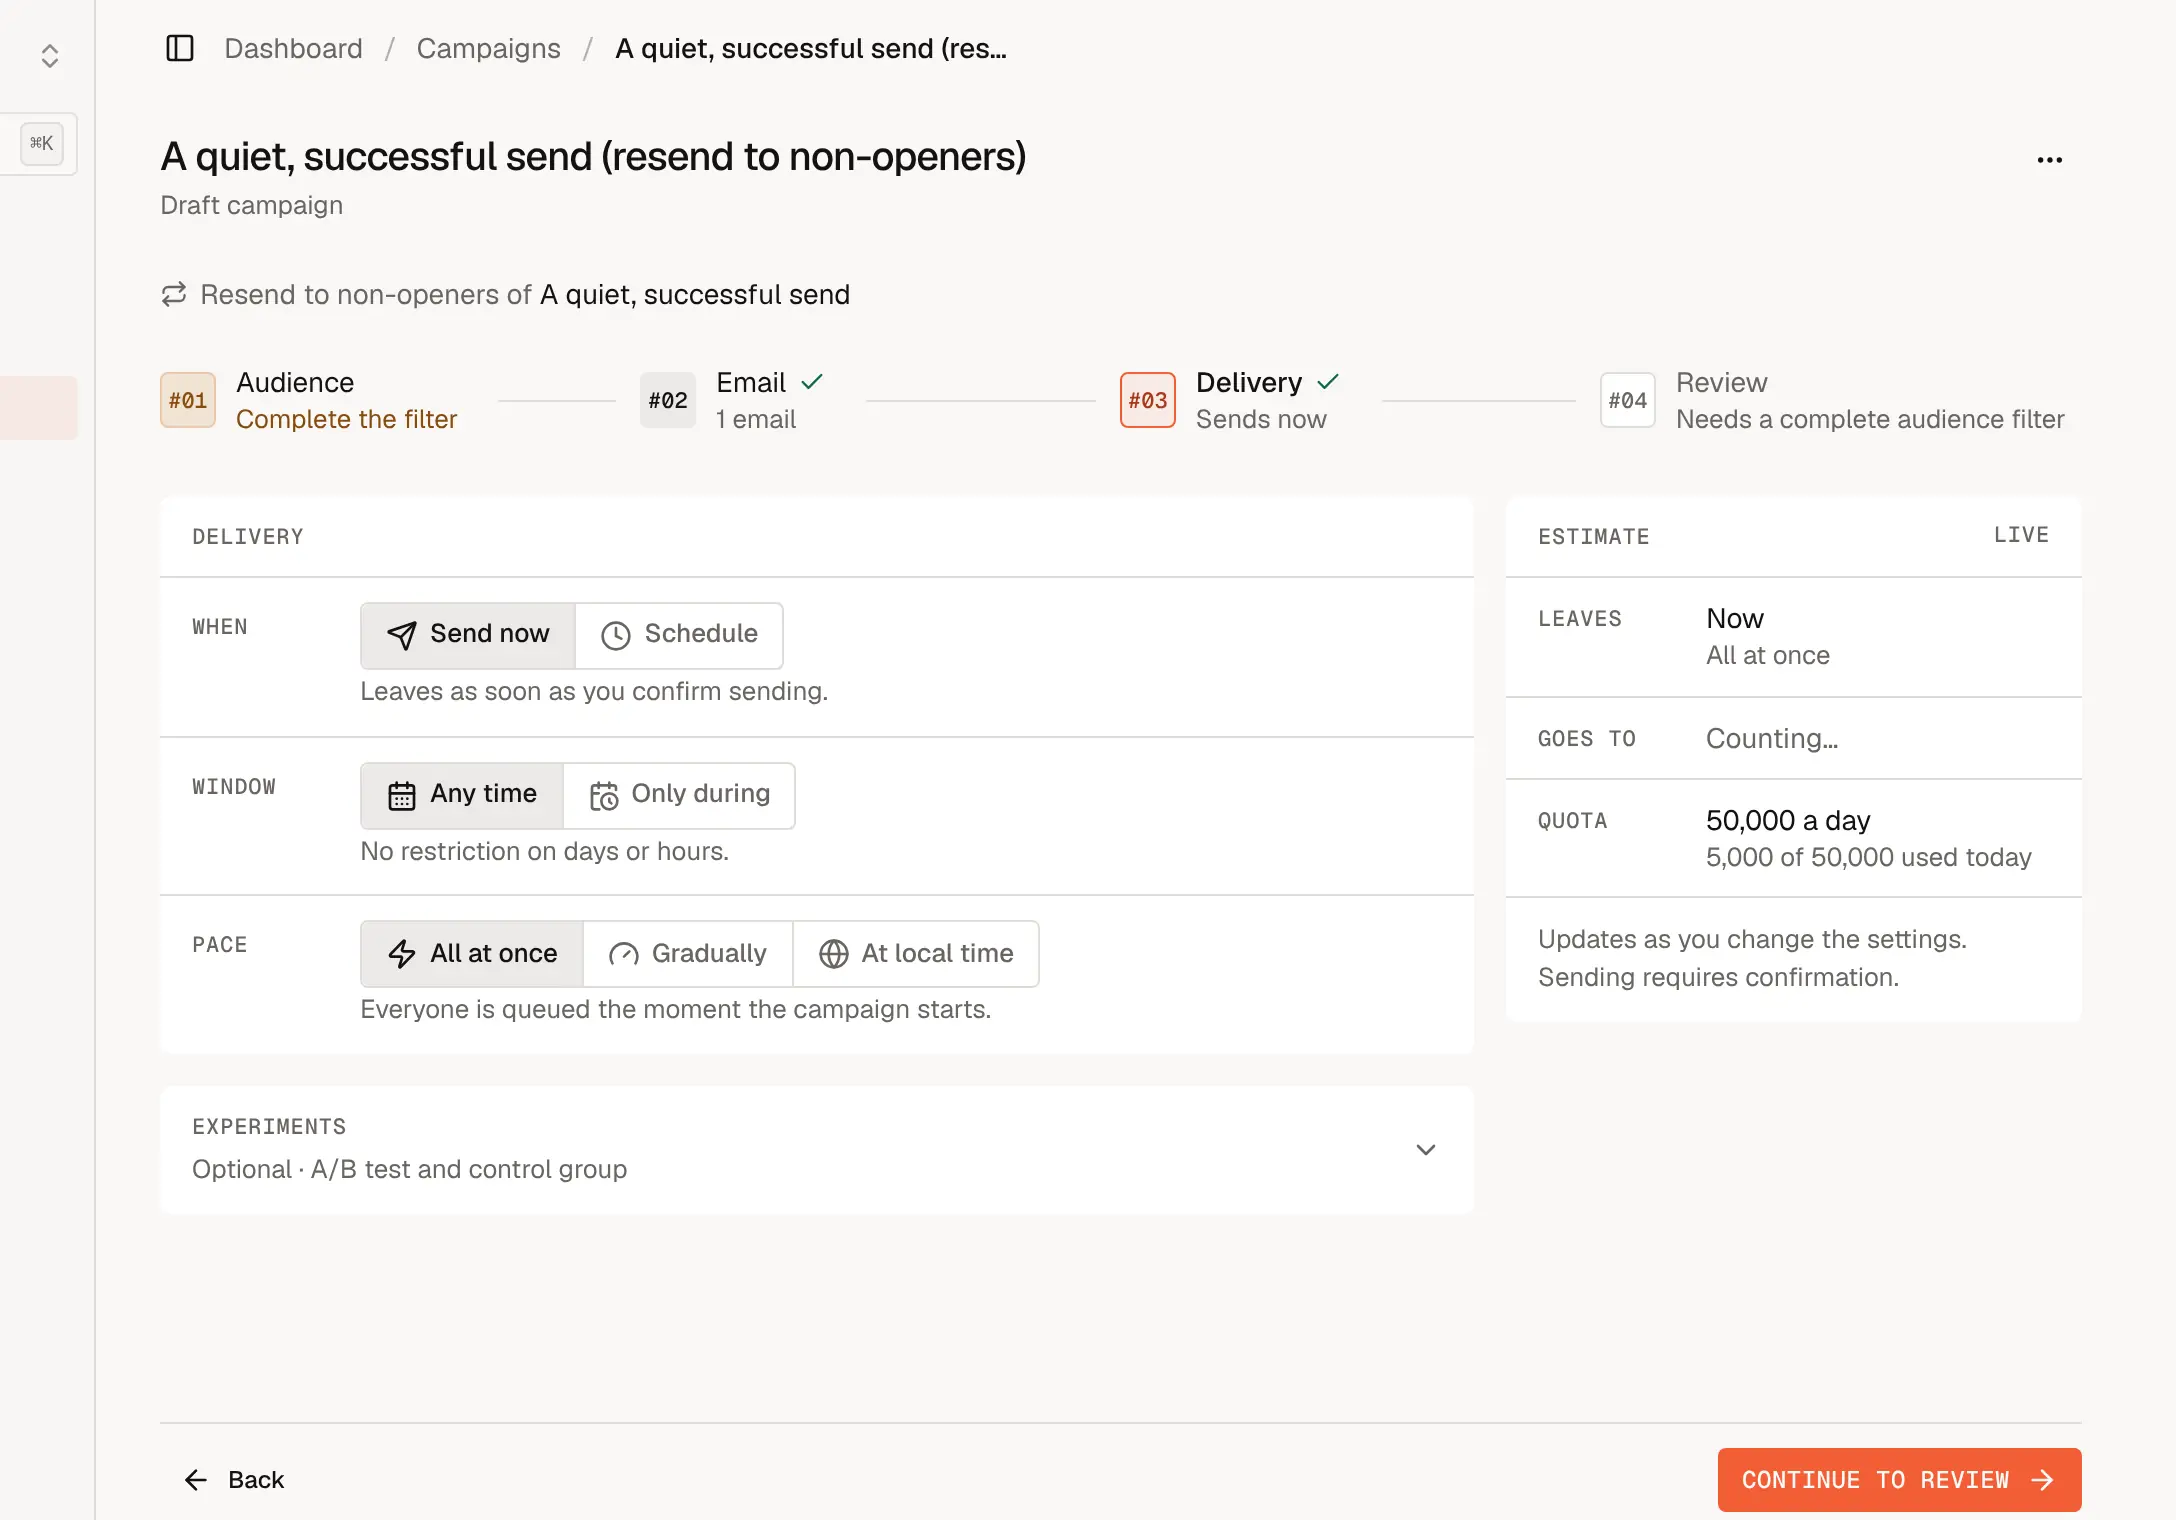
The Estimate panel shows when the campaign leaves, how many contacts it goes to, and how much of your daily sending quota it uses. Sending windows, gradual sending, local-time delivery and A/B tests are explained in Scheduling.
Review and test
The Review step lists everything in one manifest, with an Edit link next to each line, and runs a set of checks: does the audience have eligible recipients, is the sender verified, does the email have a subject and a body that render, and does it include your postal address.
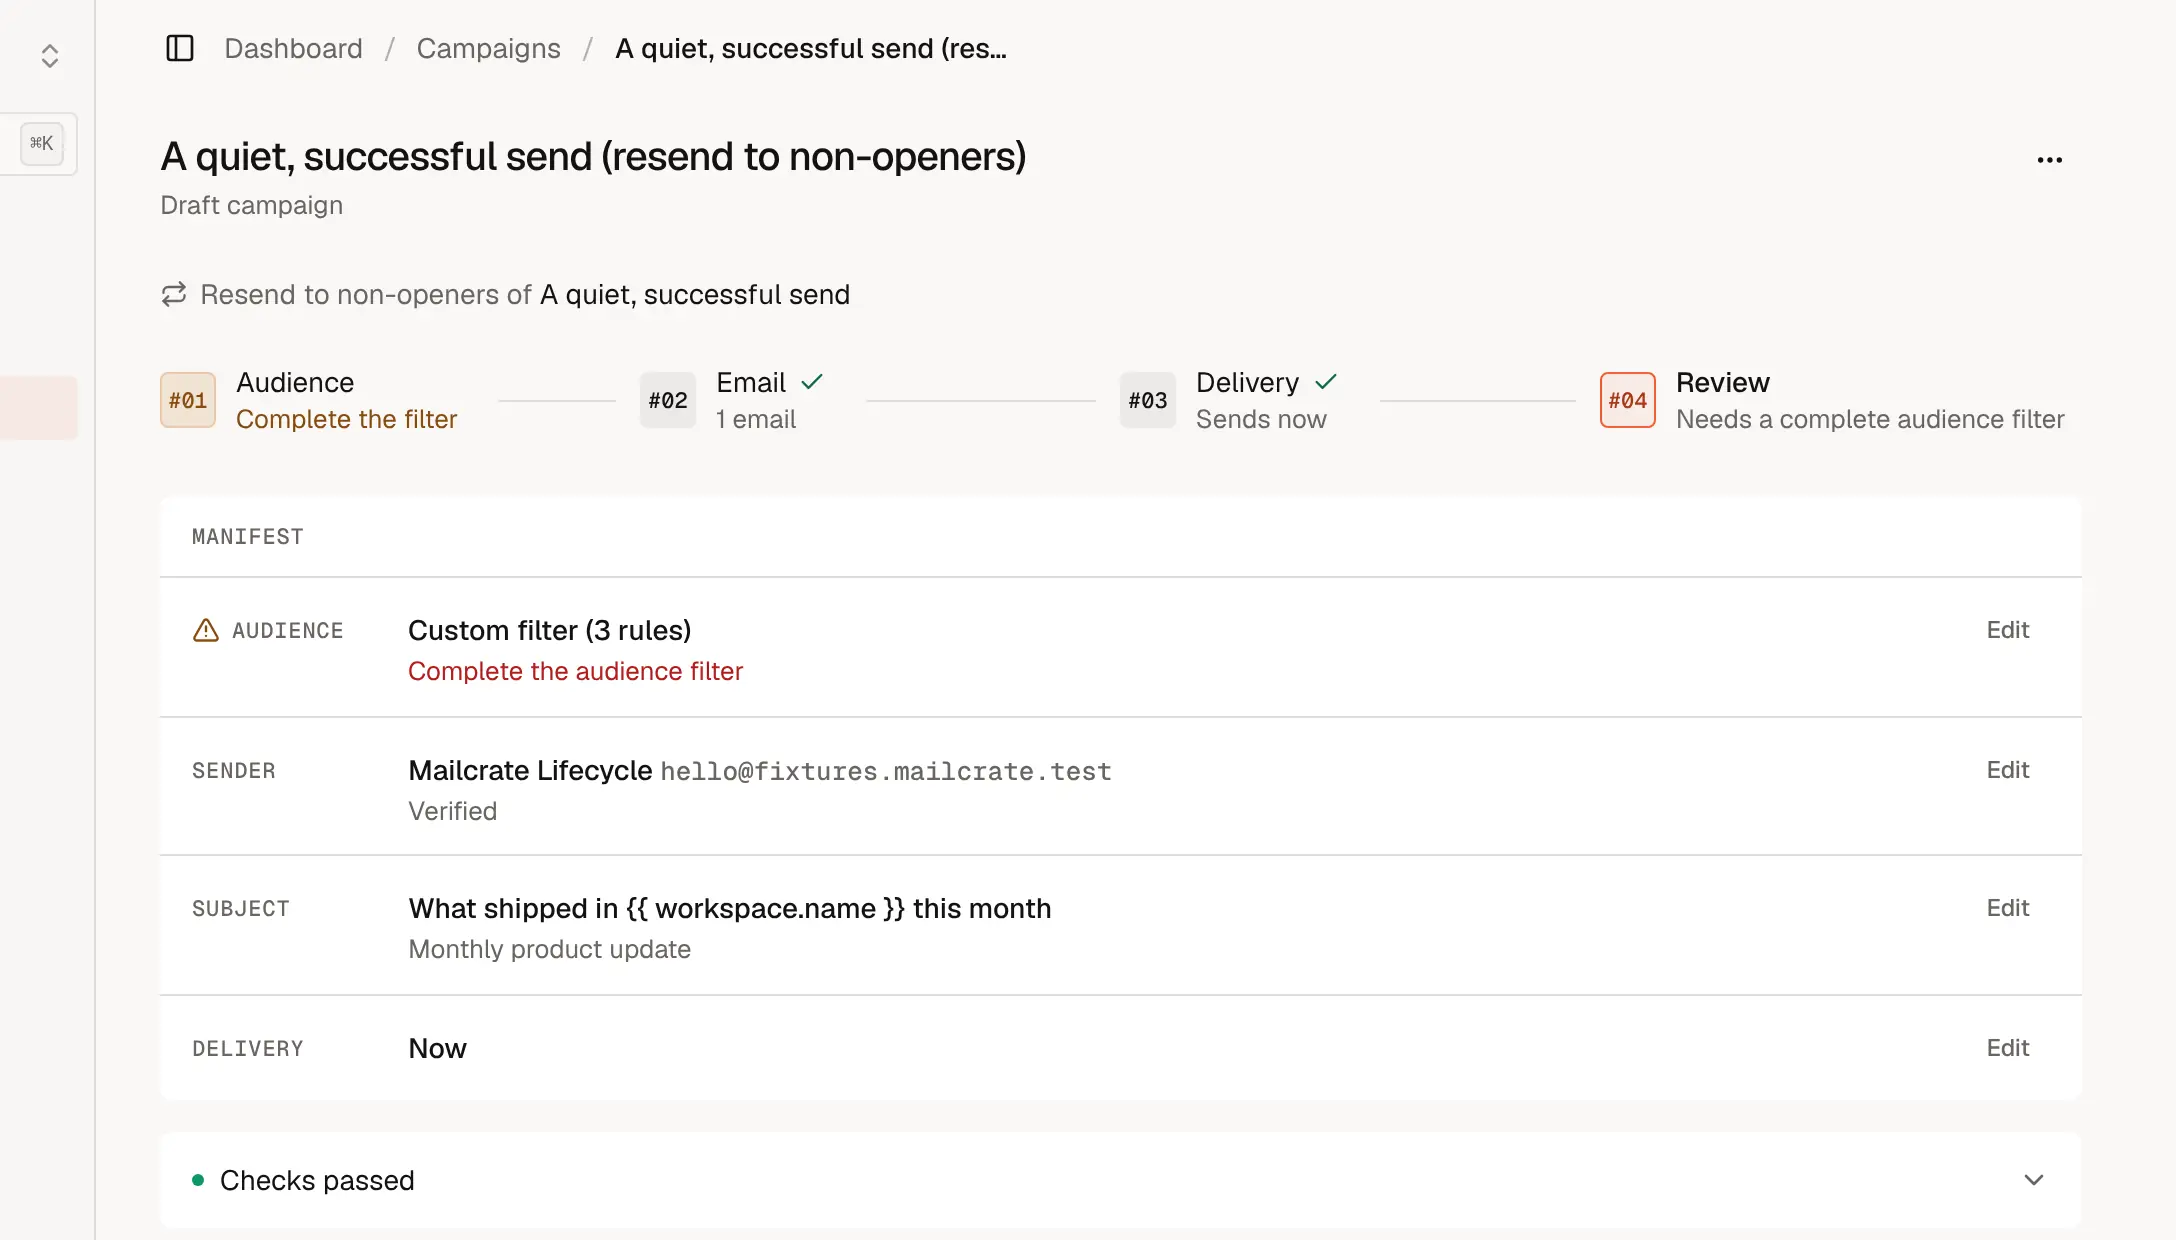
Anything that blocks sending is listed as a thing to fix first. Warnings, such as a missing {{ sender_address }} merge tag, can be sent anyway but are worth fixing.
Choose Send test email to send the campaign to your own address only. Open it in your inbox and check the layout, the links and the merge tags before anyone else sees it.
Send it
Choose Send campaign (or Schedule campaign). Mailcrate shows a final summary of the sender, audience, email and timing. Check it and choose Send now or Schedule send.
A one-time review for your first large campaign
To protect deliverability for everyone, a new workspace's first campaign to more than 1,000 recipients is held for a quick review by the Mailcrate team. It is usually approved within a few hours and then sends automatically. Smaller campaigns, and every campaign after the first approved one, send without waiting. See Review & Approval.
See how it did
Open the campaign from the Campaigns list to see its report: how many emails were sent, delivered, opened and clicked, and how many bounced or were marked as spam.
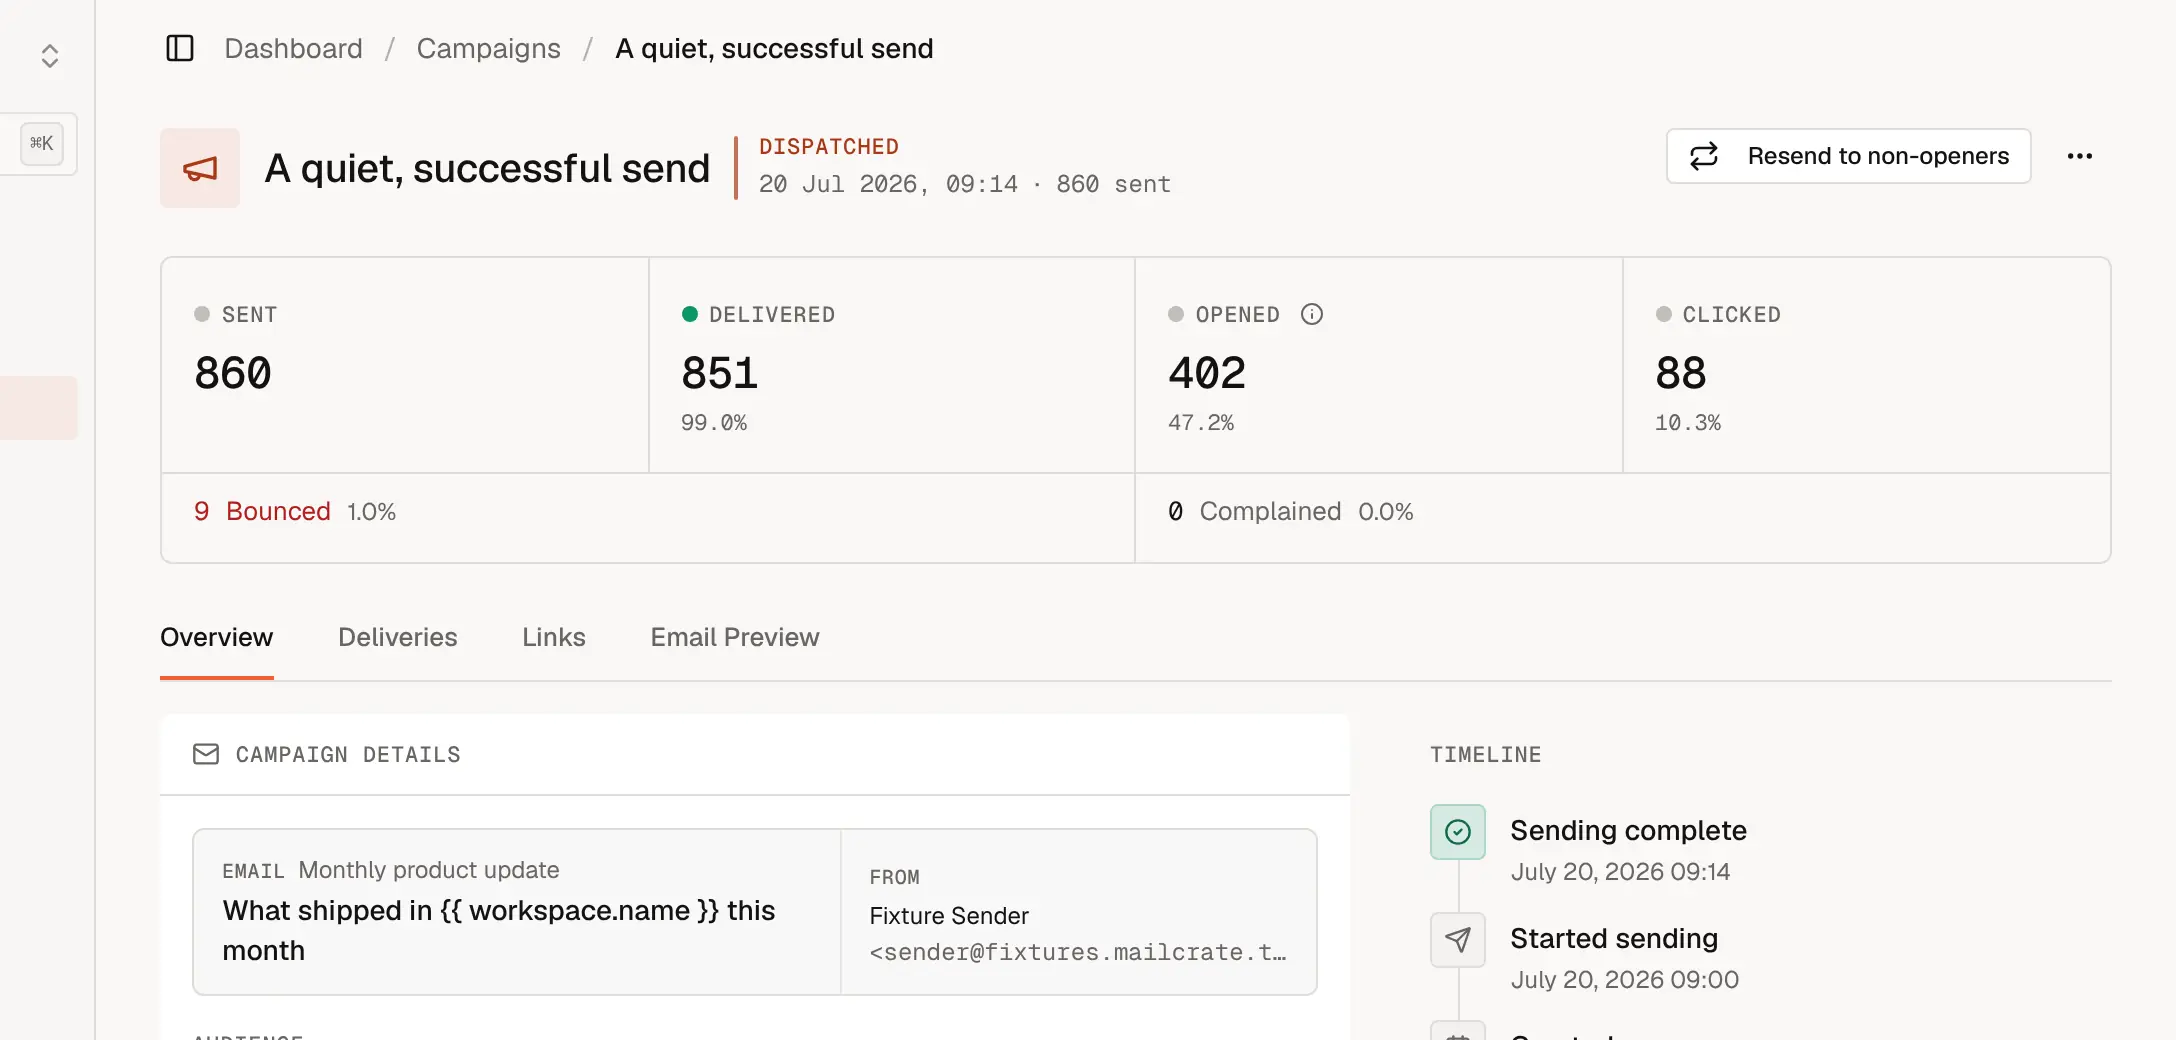
The Deliveries tab lists every recipient and what happened to their email, Links shows which links were clicked, and Email Preview shows what was sent. To nudge people who didn't open it, choose Resend to non-openers, which creates a follow-up draft aimed at exactly those contacts. More on reading the numbers in Delivery Log.